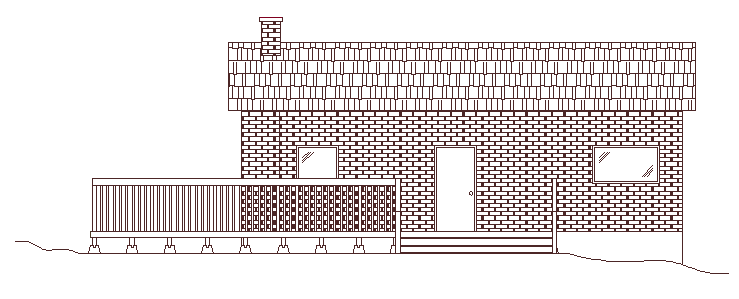
Elevation Drawings in AutoCAD
- Lesson 2-1PLANNING A PROJECT - OFFICE FLOOR PLAN
- Lesson 2-2INTRODUCTION TO BLOCKS - CREATING AND INSERTING (DYNAMIC BLOCKS)
- Lesson 2-3ALIGN AND ROTATE COMMANDS
- Lesson 2-4ATTRIBUTES - NON-GRAPHICAL INFORMATION
- Lesson 2-5HATCHING - FILLING AREAS
- Lesson 2-6WORKING WITH TEXT
- Lesson 2-7POLYLINES
- Lesson 2-8LAYOUT TABS - PLOTTING AND PAPER SPACE
- Lesson 2-9PARAMETRIC CONSTRAINTS
- Lesson 2-10ELEVATION DRAWINGS
- QUIZ FOR LEVEL 2 - 47 QUESTIONS
Topics covered in this Lesson:
Elevation Drawings and Techniques
What is an Elevation Drawing?
By now you should be familiar
with floor plans. A floor plan is a view of a building drawn as if you were looking
at it from the ceiling. An elevation drawing is the view
that you would see in real life as you stood on the floor or ground and looked at
the wall. This view can be either an exterior or interior view.
Like any CAD drawing, an elevation view is used to convey information. An exterior elevation might be used to show a home buyer what the front of their new home will look like, complete with bushes, bricks, and window trim. Another example is an interior elevation drawing to show a contractor where finishes and items are to be used. The first example would be quite detailed, while the second would be more basic (but might contain dimensions). The number of elevation drawings needed will be based on each project's needs.
This exercise will be your first chance to start designing. You'll start with a floor plan and draw a front exterior elevation and an interior elevation. The techniques will be the same, but the difference will be in the detail that you provide. The end of this tutorial features a video for another look at this concept.
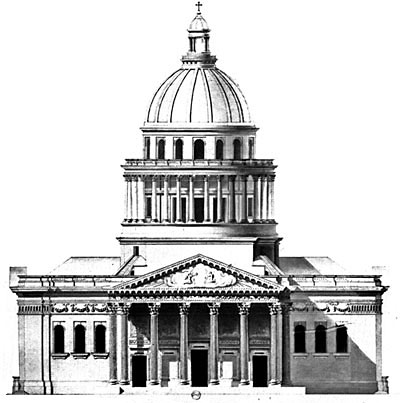
Getting Started with Elevation Drawings
Before you start the elevation drawing, you will need a floor plan. You will need to establish the overall size of the building and placement of windows and doors and other features.
If you are not familiar with Orthographic Projection, take time to review this tutorial. The concepts are very similar. To create an elevation, you will project down from the floor plan to create a new view. For this exercise we are going to use the Cabin drawing that you might have drawn earlier in this level. If you didn't draw it, you can download it here. Have a look at it and start thinking about what the cabin might look like from the outside.
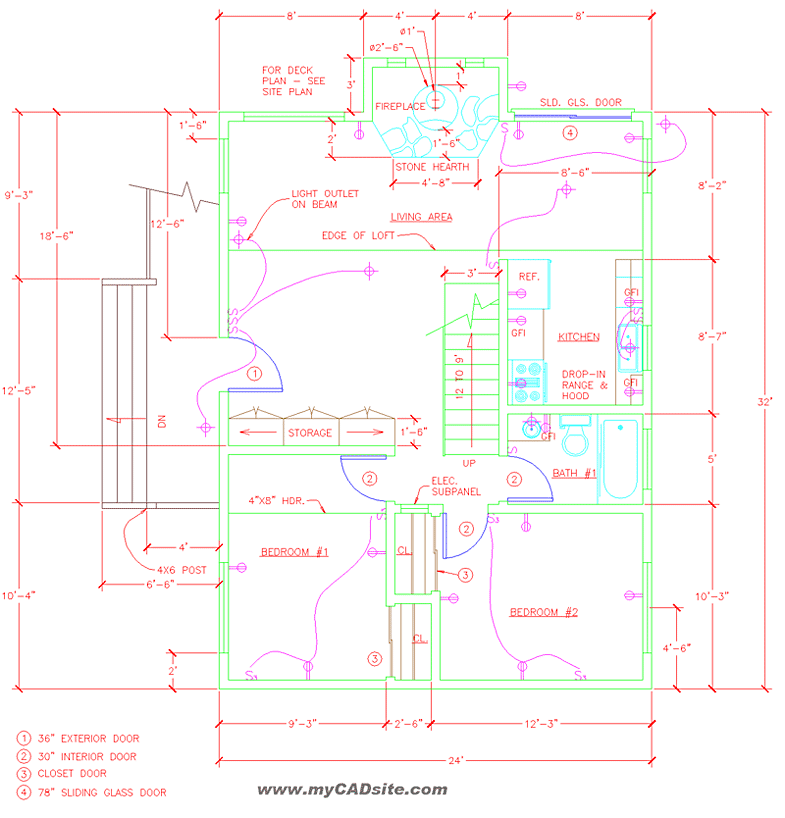
The left side has a deck, some steps, a door and two windows. You will also have to consider the roof and the fireplace (which will have a chimney. I haven't given any heights to the walls or windows nor the slope of the roof. You will need to figure these out (I'll help!) and you will also have to design the exterior materials. Will your cabin have brick, stone, wood or some other material on the exterior wall?
First Steps
Now that I have the drawing open, I'm going to turn off any layers that I don't need. Next, I'll make a copy of the floor plan and move it well away from the original. I have lots of room in model space, and don't want anything to overlap. Then I will rotate the drawing so the the side that I'm drawing the elevation of is pointing down.
Now I can start drawing (but of course, I created some new layers) and project some lines down from the key points of the floor plan. Use Osnaps to be accurate. If you followed along, you should see something like this:
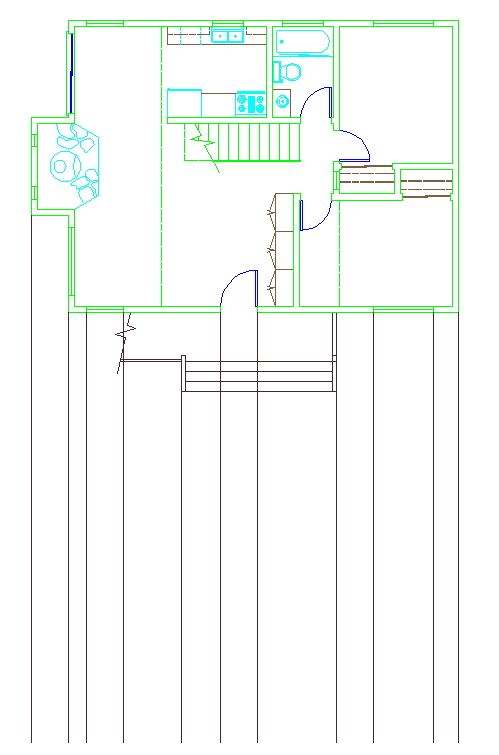
So far this is just like Orthographic projection. What's next? Remember how I've said earlier to "draw in the order that you would build it"? In this case, you want to draw a line that represents the top of the foundation that the cabin sits on. This will be the baseline from which the other lines will be offset.
How tall are your walls? Allow from for a small attic or insulation on top. How tall is the door? The top of the windows will usually be at the same height as the door.
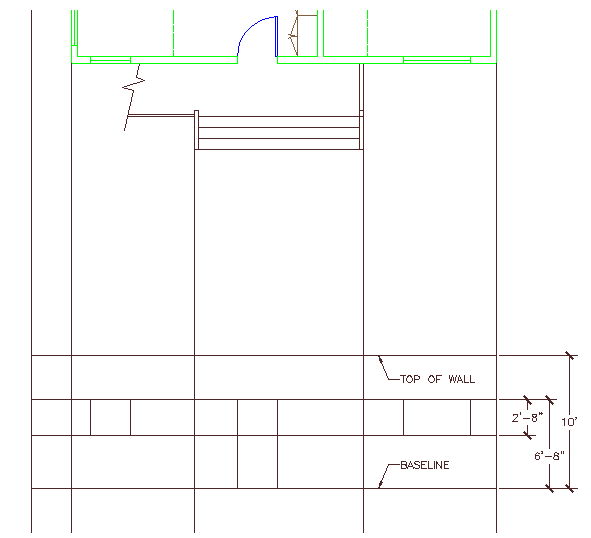
Now I've got my windows roughed in, a door and a wall. Good start, but lots more to do.
I'm going to use a pitch of 5/12 meaning that for every 12 units of length, the roof will rise 5 units. Since my cabin is 24 feet wide and the roof is in the middle, this is an easy one to figure out. For 12 feet of length, the roof will rise 5 feet. Therefore my roof will be 5 feet high.
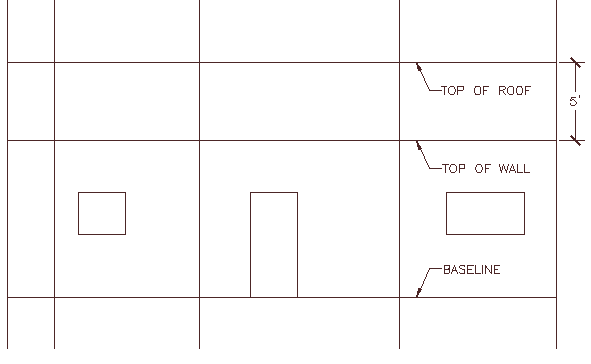
Next I want to add a overhang for my roof. To do this, I could calculate is again, or I could draw it as another projection. I did this and then rotated it so that you could see it clearer. Have a look:
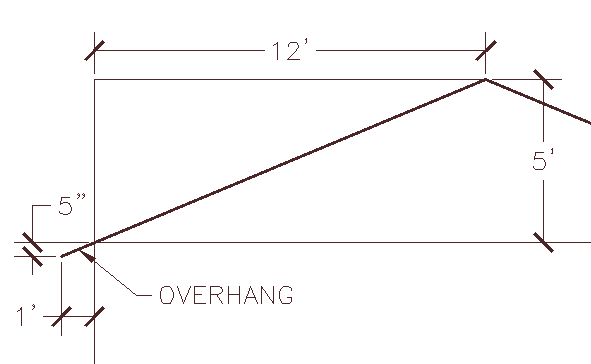
Looks like a 5 inch overhang if I extend the roof out 12 inches past the wall. Now I just need to offset a line 5 inches. The image below shows my rough outline for the elevation. I've added in a hidden line to show where the wall is, but this is only for reference and will be erased.
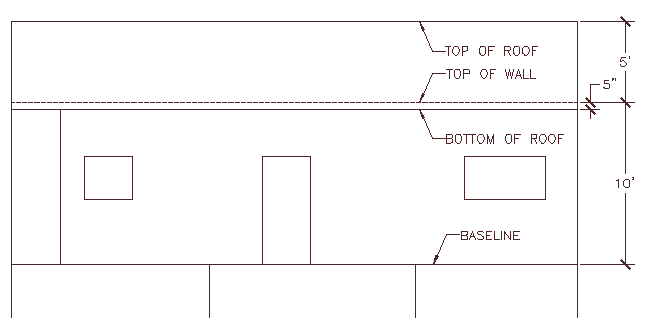
Next I'm going to draw the deck. If you look at the floor plan, there is a break line that shows the deck is bigger. I am going to make my wrap around to the side and make it larger to accommodate a table, hairs and a bar-b-que. I also need to add the steps and the railing around the deck.
I haven't designed a deck before, so I did what I normally do when I need information: I asked google. I went to deckplans.com and got the specs that I needed. Here's what I downloaded and will use as reference: Link. Deckplans.com will also give me the specifications for the foundation blocks: Link.
Looking at the plans, I see that I need some foundation blocks, 1-1/2" of overhand and 2x6 boards. Since this is for demonstration purposes, I'll keep it somewhat simple.
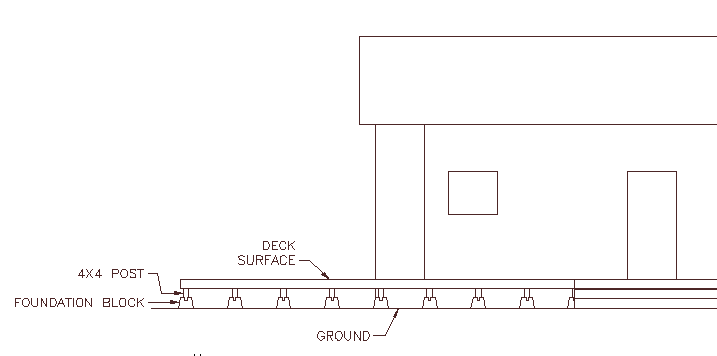
If you looked at the plans, you would have seen that 4x4 posts are needed to support the deck. I've added in the foundation blocks at 3 feet spacing, and added the deck and the steps. Now I need to add the railing.
I check the code to see that the minimum height for a railing is 36 inches about the deck surface. I'm going to make mine a little taller at 40 inches. I also checked the codes for my baluster spacing. I can have a maximum of a 4 inch opening between balusters. Now that I know that, I just need to know what size my materials will be. I will use a 4x4 post at all of the corners and 2" wide straight baluster. To draw this is just a simple matter of offsetting and then trim the objects 'behind' the deck railing.
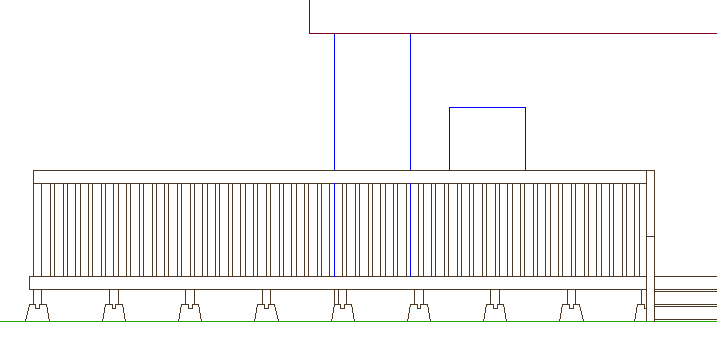
Note that I used the 4x4 posts for the handrails by the steps. It's also a lot of lines. I have changed the walls and windows to a Blue layer. Notice how you can still see the walls through the balusters? The window has been trimmed.
With the deck done, I'm going to go back to the main wall. I wanted to get the deck done first, because I knew I would be blocking some of the wall. My usual rule for detailing elevations is to add detail first to the objects 'closest to you'.
Before I add details, though I will make a chimney for the roof. I checked code and found that most chimneys should be 2 feet about the peak of the roof. So I drew a line down from the center of the fireplace (notice the small circle for the flue?) and then offset it to make a 18 inch wide chimney.
Now I can add my hatch patterns to make the walls and chimney brick and add shakes to the roof. After a few hatch commands and some other small details, you might end up with something like this:
Remember that elevations are a visual representation, so you can make them as detailed as needed. You can go a step further and add colors in a program like Photoshop (for an example, click here). Later on if you start drawing 3D, you can create rendered images that look almost photographic, but for 2D work, elevation drawings do a great job.
Learn how elevations work, and be careful about what objects appear in front of others. There are not a lot of commands that are needed when creating elevations, but you need to learn how to use them wisely, and be fully aware of what you are drawing.
Note: You can also draw the elevations in place without rotating the original floor plan. In this case you can easily add this to the layout by using the DVIEW command. Check out this tutorial for details.
Extra practice: Copy the floor plan to the left, then rotate it 90 degrees counter-clockwise. Draw you projection lines down, then draw lines over from your existing elevation to get the heights. Finish this and the other 2 sides.
Extra practice: Draw some interior elevation from this floor plan. Add outlets, lights and other details.
Video: Creating Elevation Drawings in AutoCAD
You Scored:

Fun fact: In 1994, Autodesk had shipped one million software packages worldwide, and AutoCAD remained the primary source of company revenue. Sales of AutoCAD and AutoCAD updates accounted for 85 percent of Autodesk's revenues in 1994, while net revenues reached $405.6 million.
Please support
MyCADsite.com
Give a donation!
Donate

- To cover this months server costs
- Exceeding amounts will go to creating new content
- Even a penny will help
Return to top of the lesson | Return to the table of contents
Take Level 2 Quiz
Continue To Next Level
Did you like the lesson? ❤️

